Introduction
Text Basic
HTML have six type of
Headings:
Heading One (H1)
<h1>Heading
                                            One (h1)</h1>
Heading Two (H2)
<h2>Heading
                                            Two (h2)</h2>
Heading Three (H3)
<h3>Heading
                                            Three (h3)</h3>
Heading Four (H4)
<h4>Heading
                                            Four (h4)</h4>
Heading Five (H5)
<h5>Heading
                                            Five (h5)</h5>
Heading Six (H6)
<h6>Heading
                                            Six (h6)</h6>
Here above I have dislayed how different headings
work in html
Now let me talk about, How to write paragraphs?
I have already told you about the body of the html
how
everything is
written. so, lets start
You will use
                                    <p> Productive
                                    day kise kehte hai?  </p>
it will be shown like this
Productive day kise kehte hai?
Do Give your answer :)
Now Let me tell you about another term <address></address>
for example
 <address>INDIA
                                     </address>
this will be diplayed as:
INDIA
Lets talk about List types
HTML has Ordered List, Unordered List,and description List
-
Ordered List
 <ol>

 <li>
                                    First Item </li>

 <li>
                                    Second Item </li>

 <li>
                                    Third Item </li>

</ol>
code:
- 1. First Item
- 2. Second Item
- 3. Third Item
-
UnOrdered List
 <ul>

 <li>
                                    First Item </li>

 <li>
                                    Second Item </li>

 <li>
                                    Third Item </li>

 </ul>
code:
- First item
- Second item
- Third item
-
Description List
  <dl>

 <dt>Math </dt>

 <dd>-amazing
                                    subject</dt>

<dt>Computer</dt>

<dd>-I
                                    love it</dt>

</dl>
code:
- Math
- -amazing subject
- Computer
- -I love it
Learning Link in HTML
We are going to start with an examples
- Anchor Tag
- This is used to insert a link of another page.
- Using Absolute Reference
We are going to use full link therefore, this will be called as ABSOLUTE REFERENCE
For example-> You have to link a google page in your html page, so thi is how you will do.
< a href="https://www.google.com/">Google</a>
Here in href you will paste the link and after closing it by ">" you have to write the text you want to insert link in.
This is how the above example will look in your html page
- Using Absolute Reference
- Using Relative Reference
In this we will link the page which is in same server without giving any link.
Create a file with extension ".html"
For example- I am going to use socialhandels.html
Here in href you name the file(file should be in same server) and after closing it by ">" you have to write the text you want to insert that page in.<a href="socialhandels.html">socialhandels </a>
-
Using Anchor to Navigate through HTML
Page
Now you might have seen that when web page is big you get the navigation system to navigate through different topics, we are going to do same using HTML.
For example- You are reading on this page and now you want to directly jump to List Types in HTML Topic.
So this is how you will do
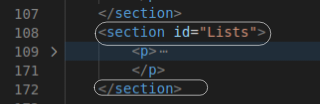
Use section for using navigation and don't forget to give id
All the code of List(section) should be inside <section id=""></section>
Now after completing the above instructions we have to add navigation section using <nav></nav> element
                                        <nav>


 <a href="#Lists">List
                                        Types</a>


</nav>
Don't forget to add "#" while calling the element
This is how this code will work
Now to experience how this navigation work i am adding navigation control here try it your self.
                                                <nav>

                                                <!--Using UnOrder List for
                                                better format-->

                                                <ul>

                                                <li>

                                                <a href="#absolute">Absolute
                                                Reference</a>

                                                </li>

                                                <br>

                                                <li>

                                                <a
                                                href="#RelativeReference">Relative
                                                Reference</a:

                                                </li>

                                                <br>

                                                <li>

                                                <a href="#">Back To
                                                Top</a>

                                                </li>

                                                <br>

                                                <li>

                                                <a
                                                href="#download">Download</a>

                                                </li>

                                                <br>

                                                <li>

                                                <a
                                                href="#contacts">Contact</a>

                                                </li>

                                                </ul>

                                                </nav>
This is the code I have used for navigation panel.
To go back to top you have to use only "#" while calling an id, without declairing it.
- Set a file or image to be downloaded from
user
Here I will tell you how you can make your user to access some of your files and download them.
For example- you want to make your user to download an image then you can use Anchor Tag for this(Image should be present in your server)
lets say you want to make your user access or download Thankyou.jpeg, you will use this:<a href="Thankyou.jpeg" download>download image here </a>
-
Add Contact option which redirect them
directly to respected apps
-
MAIL
You can add mail to your HTML Page
Code-
                                                        <a
                                                    href="mailto:example@gmail.com">Mail
                                                    me </a>
Here this is how it will show on Page
-
PHONE NUMBER
You can add phone number to your HTML Page
Code-
Here this is how it will show on Page<a href="tel:+919958675577">Phone number </a>
-
MAIL
<img src="img/img.png"
alt="Showing how to add image to HTML Page"
Lets see how Radio button work...
Lets see how Checkbox work...
<form>
Open the PDF
cheatsheet by Stanford
Happy Learning future Developers!Add Image to HTML Page
width="378" height="353" loading="lazy">
This is what the result will be
<figure>
<br><img src=" img/img.png"
alt="Showing how to
add image to HTML Page"
width="440"
height="178" loading="lazy">
</figure>
<figcaption>
<caption>This is caption of an image
</caption>
</figcaption>
Image given above is an examle of adding image with
caption to HTML.
There are many elements we can use in <img>
I will be listing some of them.
The alt attribute specifies an alternate
text for an area, if the image cannot be
displayed. The alt attribute provides
alternative information for an image if a user
for some
reason cannot view it because of slow
connection, an error in the src attribute, or if
the user
uses a screen reader.
You can see in the above image, the alt
attribute I have used.
The height and width properties are used to
set the height and width of an element. The
height and width properties do not include
padding, borders, or margins.
Well this was like googled answer but why
we really need to give width and height?
We give width and height of an
image because of cumulative layout shift.
What is cumulative layout shift?
Well in simple word it helps how often users
experience unexpected layout shifts. For more
insight on this you can refer to this article.
cumulative
layout shift
The loading attribute specifies whether a
browser should load an image immediately or to
defer loading of off-screen images, loading by
default is active(loading="active") for example
the user scrolls near them. Tip: Add loading="lazy"
only to images which are
positioned below the fold.
What is fold?
Fold is the border line between the content
you can see on your screen and the content you
can't which is present on same page. Simply put
the part of website which will come on screen
after scrolling scroll bar is called below the
fold. Now from this you can understand what is
fold.
Caption is used to give a caption to a image
here in the above image. you can see
<caption></caption> attribute under
<figcaption> </figcaption>
attribute.
<figcaption>The
<figcaption> HTML element represents a
caption or legend
describing the rest of the contents of its
parent <figure> element.
<figure>
                                <img src="img/img.png"
                                alt="Showing how to add image to HTML Page"

 width="378" height="353" loading="lazy">
</figure>
<figcaption>
<caption>
This is caption of an image
</caption>
<figcaption>
Adding Table to HTML page
What are the uses of tables in HTML?
Google it (:
Table starts from <table></table>
element
But as like table have many blocks- row,
column,Table header, footer.I will talk about all of
them.
Now I will show you how you can make table
and add different elemnts in it using
elements/tags like
<table> <tr> <td>
<Colgroup> </Colgroup> is used
for adding a seecific feature to specific
columns. In the
example
given below I have added new background colour
to specific column (S.NO.)
Forms in HTML
We start making form in HTML by
<form> </form> element
<form> consist of input elements such
as text fields, checkboxes, radio buttons,submit
buttons,
etc.
<input> element
The HTML <input> is the most used
form element
Type
Description
<input
type="text">
Displays a single-line
text input field
<input
type="radio">
Displays a radio button
(for selecting one of
many choices)
<input
type="checkbox">
Displays a checkbox
(for selecting zero or
more of many choices)
<input
type="submit">
Displays a submit
button (for submitting
the form)
<input
type="button">
Displays a clickable
button
<label> element
Now using <input> and <label> I
will make a part of a form
The code I used to make this part of
form
                                            <form >

<label for="fname">First
                                            name:</label>

 <br><input type="text"
                                            id="fname" name="fname">

 <br><label
                                            for="lname">Last
                                            name:</label>

 <br><input type="text"
                                            id="lname" name="lname">

</form>
Radio Buttons
Will you contribute to this
project?
Code for this:
                                                <form >
                                                <input type="radio" id="yes"
                                                name="Will you contribute to
                                                this project?" name="yes">

 <label
                                                for="yes">Yes</label>

 <input type="radio"
                                                id="no" name="Will you
                                                contribute to this project?"
                                                value="no">

 <label
                                                for="no">No</label>

 <input type="radio"
                                                id="notsure" name="Will you
                                                contribute to this project?"
                                                value="notsure">

 <label
                                                for="notsure">Not
                                                Sure</label>

 </form>
Checkboxes
The <input type="checkbox">
defines a checkbox.Checkboxes let a user
select ZERO or MORE
options
of a
limited number of choices.
Where do you found about this
project?
Code for this:
<input type="checkbox"
id="Github" name="Where do you
found about this project?"
value="Github">
<label
for="Gihub">Github</label>
<input type="checkbox"
id="twitter" name="Where do you
found about this project?"
value="twitter">
<label
for="twitter">Twitter</label>
<input type="checkbox"
id="discord" name="Where do you
found about this project?"
value="discord">
<label
for="discord">Discord
Server</label>
<input type="checkbox"
id="others" name="Where do you
found about this project?"
value="others">
<label
for="others">Others</label>
</form>
Submit Button
The submit button is used for submitting
the form data to a form-handler
What is form-handler?
The form-handler is a file on the
server with a script for processing
input data.
form-handler is specified in the form's
"action" attribute.
Code for the Submit button
<button
                                            type="submit">Submit</button>
Reset Button
Reset button is used for resetting the
form
<button
                                            type="reset">Reset</button>
Now let's make a complete form
Adding Videos in
HTML
The video tag is used to
embed video content in a document,
such as a movie clip or other video
streams.
We start adding video attribute
in HTML by <video>
</video> element
<video> consist of input
elements such as width,
height,controls and so on.
There are three supported video
formats in HTML: MP4, WebM, and OGG.
Now let's see how to add video to
html page
Now lets see how I added this video
<video
                                                src="img/videohtmlpage.mp4"
                                                width="200px" height="120px"
                                                type="video/mp4">example
                                                video</video>
Adding Audios in
HTML
The audioelement is used
to play an audio file on a web
page.
There are three supported audio
formats in HTML: MP3 and OGG.
Now let's see how to add audio
to html page
Now lets see how I added this
audio
<audio controls
                                                    autoplay muted>
                                                    <source src="bird.ogg"
                                                    type="audio/ogg">
                                                    <source src="bird.mp3"
                                                    type="audio/mpeg"> Your
                                                    browser does not support the
                                                    audio element.>
Adding Text
Formatting Using HTML
Text Formatting in HTML is done
by using these elements.
Strikethrough by
using <s></s>
elements.
For example : 2H2
+ O2 -> H2O
For example : 24
= 16
HTML cheatsheet for reference